It’s Black History Month! Yesterday, I shared a Scratch project that will help you create a Black History Month presentation. Today, we have some fun! Check out this craft tutorial inspired by the movie Black Panther. This is STILL one of my favorite shirts!
If you make this, take a pic and tag @lemonerdy on Instagram and @thelemonerdyshow on Facebook. Please give us a thumbs up, subscribe, and share this tutorial with a friend. Happy Black History Month!
Making it yourself? Here’s what you need…
Shirt – http://amzn.to/2tMg1BF
Fabric – http://amzn.to/2GpWFFo
Wonder Web Interfacing – http://amzn.to/2FOLd8m
Iron – http://amzn.to/2DqXg6s
Sewing Machine – http://amzn.to/2FQX7ys
Hair Clips – http://amzn.to/2DtdBI4
Glue Gun – http://amzn.to/2FPGLGh
Glue Guide – http://bit.ly/glueguide
Directions:
- First iron the shirt to get all the wrinkles out, with steam or without, doesn’t matter.
- Then iron the patterned fabric and the black fabric to get out fold marks and wrinkles.
- Pin the pattern to the fabric AND the fusible web. Line up the pattern so that when you cut the heart it looks good with the pattern.
- Cut out the heart shape along the lines in the pattern. When you finish, you’ll have a heart shape in the interfacing and the fabric.
- For the inside of the ears, pin two pieces of fabric and two pieces of interfacing to the pattern, then cut it out along the lines.
- Fold the black fabric in four and pin the large ear to it. Be careful not to stick yourself with the pin. Cut it out and you’ll have four pieces for the ear.
- Take two of the black earpieces and stack the interfacing and the inner patterned ear shape on top of them.
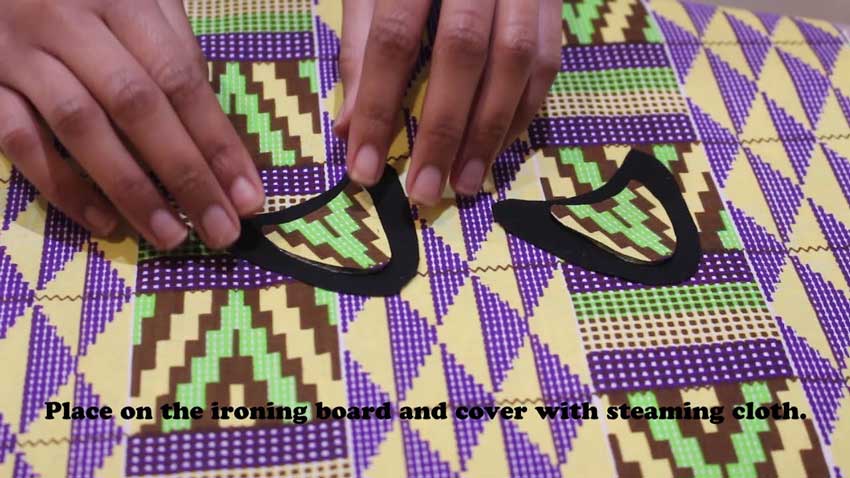
- Put them on the ironing board and cover it with the damp steaming cloth. Iron them according to the directions on the interfacing package.
- Let them cool and check to make sure that the fabric has bonded.
- Then put the heart-shaped interfacing on the shirt. Line up the patterned heart shaped fabric on top of the interfacing and make sure that the interfacing isn’t showing. You may have to trim around the interfacing to make it a little smaller than the fabric.
- Cover it with the damp steaming cloth. Iron them according to the directions on the interfacing package. Let it cool and check to make sure that the fabric has bonded.
- Stitch around the edges with a zig zag stitch. Be careful not to sew the shirt to itself.
- Stitch the black fabric to the ear, and clip the threads.
- Turn it inside out. This could take a while because it is small.
- Use a pin to pull out the points on the ears.
- Stuff it with stuffing. Not too much though.
- Glue or sew the ear closed.
- Use a nail file to scratch the surface of the clip so that the glue will stick better.
- Clean it off with rubbing alcohol.
- Use hot glue or any glue you prefer.
Like my Facebook page for behind the scenes videos and photos – https://www.facebook.com/TheLemonerdyShow/
Follow Lemonerdy on Twitter for instant updates – http://www.twitter.com/lemonerdy
Follow Lemonerdy on Instagram for more photos and videos – http://instagram.com/lemonerdy
Like and subscribe for more videos. Did you see my goals for 2018 video? Here it is!
I love coding! Check me out on Scratch…
My Scratch Projects – https://scratch.mit.edu/studios/4224187/
My Scratch Profile – https://scratch.mit.edu/users/codeycat123/
#BlackPanther #sewing #marvelcomics


